How to change your invite's theme
Try on a different look in one tap, then fine-tune colours, fonts and any part of the page in the theme studio.
A theme sets the whole look of your invite: the colours, the fonts, the shape of the buttons and the page behind it. Changing it never touches your words, so you can try on as many as you like.
-
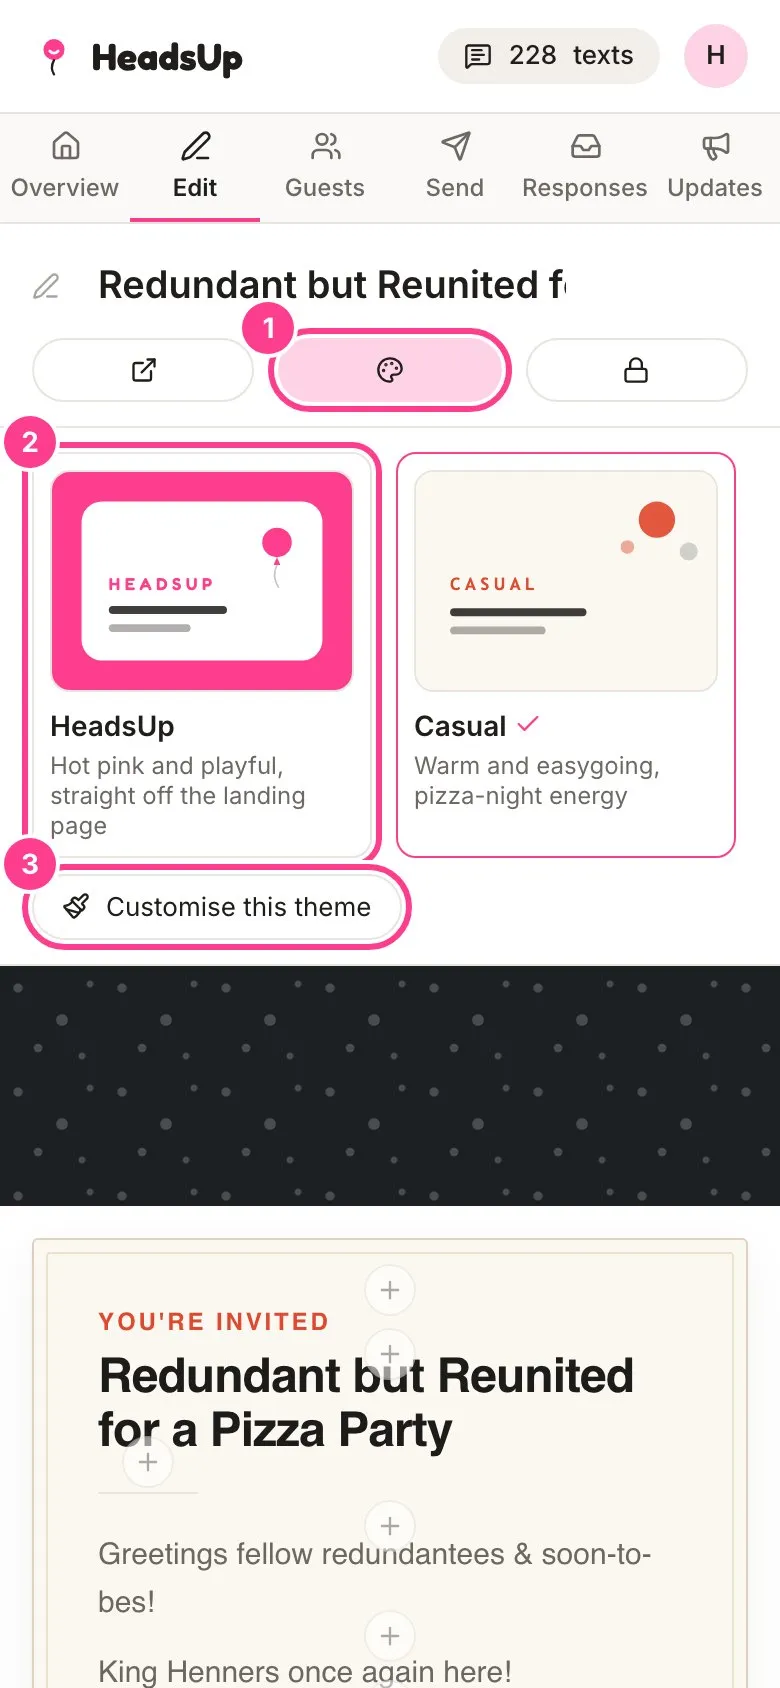
In the editor, tap Theme (the palette button at the top).
-
Tap a theme to try it on. The invite updates straight away. Swipe the row sideways to see them all: HeadsUp, Casual, Minimal, Corporate, Soiree and Kids.
-
Happy with the look but want to tweak it? Tap Customise this theme.
-
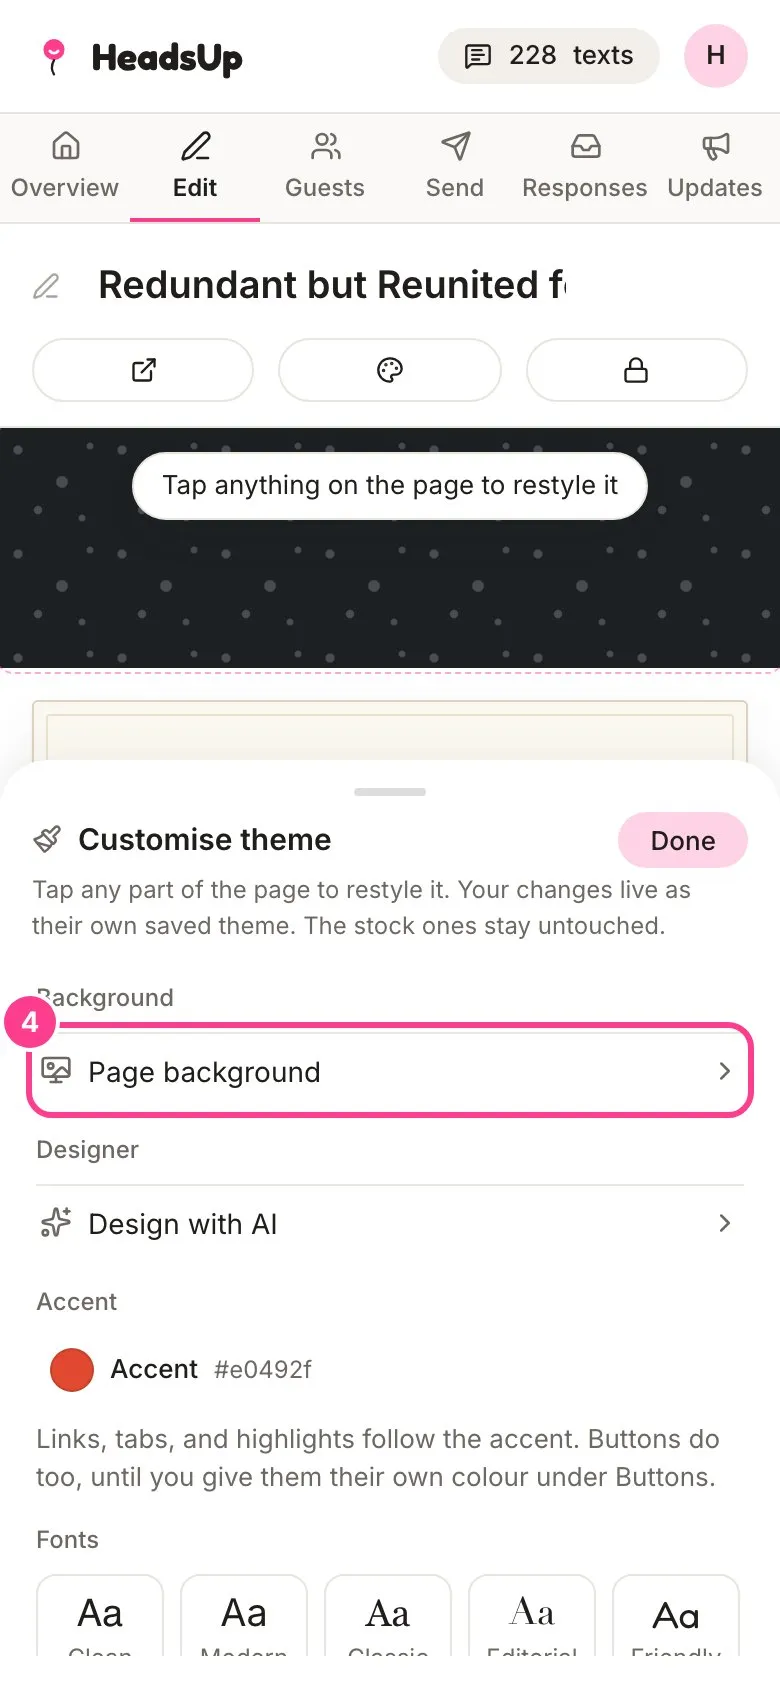
The theme studio opens from the bottom. Start with the basics, like Page background, Accent and Fonts, or tap any part of the invite itself to restyle just that part. Tap Done when you’re finished.
Good to know
- Customising never changes the stock theme. Your look is kept as its own saved theme, which shows at the front of the theme row, so you can put it on your next event in one tap.
- To rename or delete a saved theme, use the pencil and bin buttons on its tile. Deleting one doesn’t change events already wearing it. You can keep up to 30 saved themes.
- Picking a stock theme again puts the invite back to that theme’s own look. Your custom version stays saved in the row.
- Reset customisations at the bottom of the studio takes this invite back to the stock theme.
- The studio warns you if text might be hard to read on the colours you’ve picked, but it never stops you.
- On Plus and up you can also describe a look and let AI design it.
Didn't answer it?
Tell us what you were trying to do and we'll write back, or give our guide to your AI assistant and ask it.