How to add a tab to your invite
Split a busy invite into tabs, like Where, Agenda or Bring a plate, that guests flip between.
Tabs are extra pages on your invite. They show as a row of buttons under the reply card, and guests tap between them. They’re a tidy way to keep the top of the invite short while the details, the map or the potluck list each get a page of their own.
-
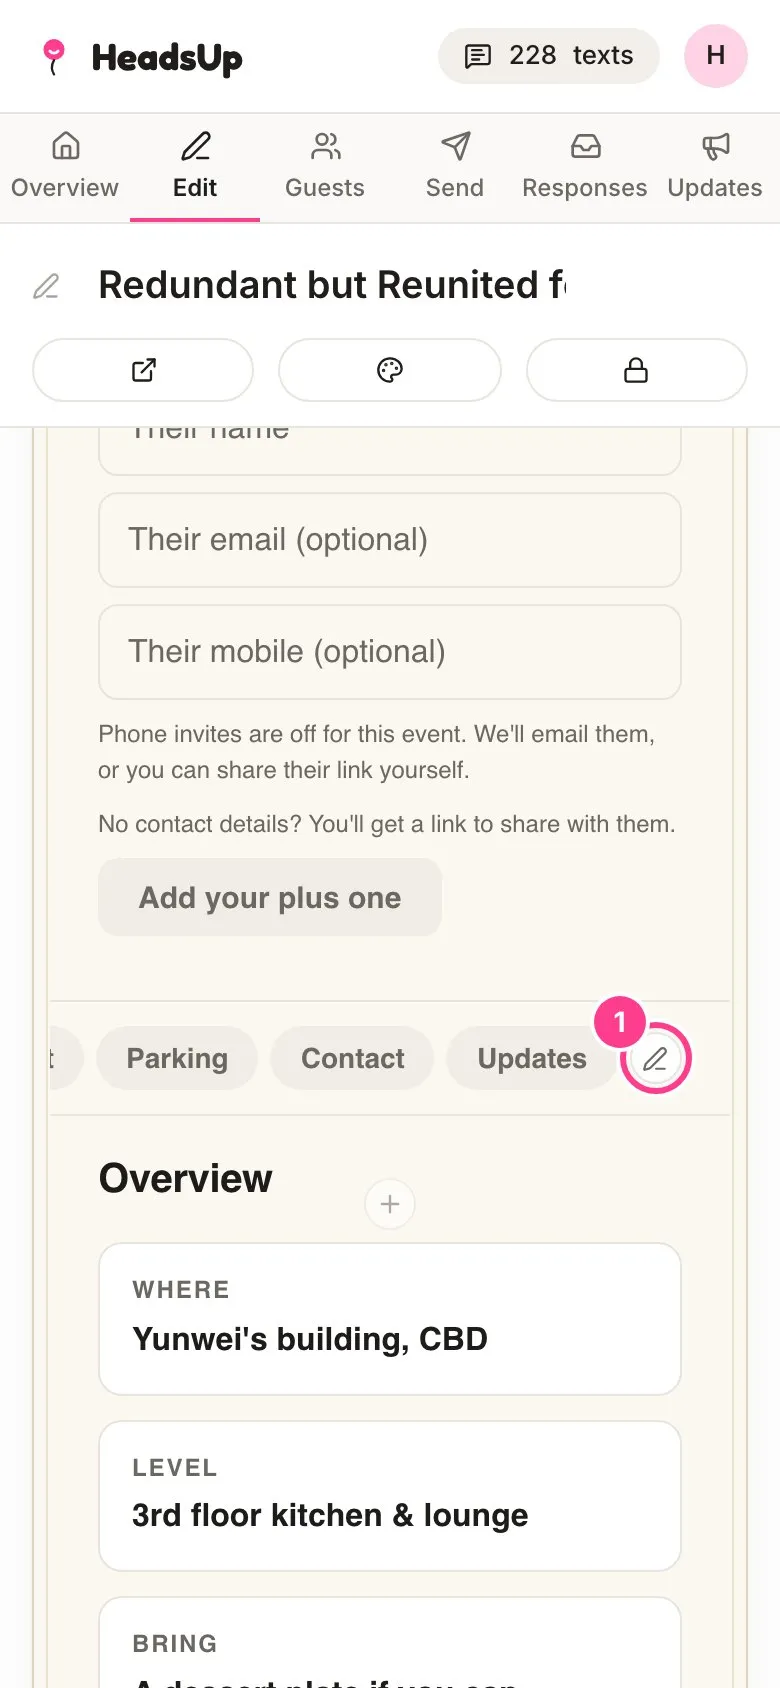
In the editor, scroll to the tab row under the reply card and tap the pencil at the end of it. No tabs yet? Tap Add a tab where the row would be.
-
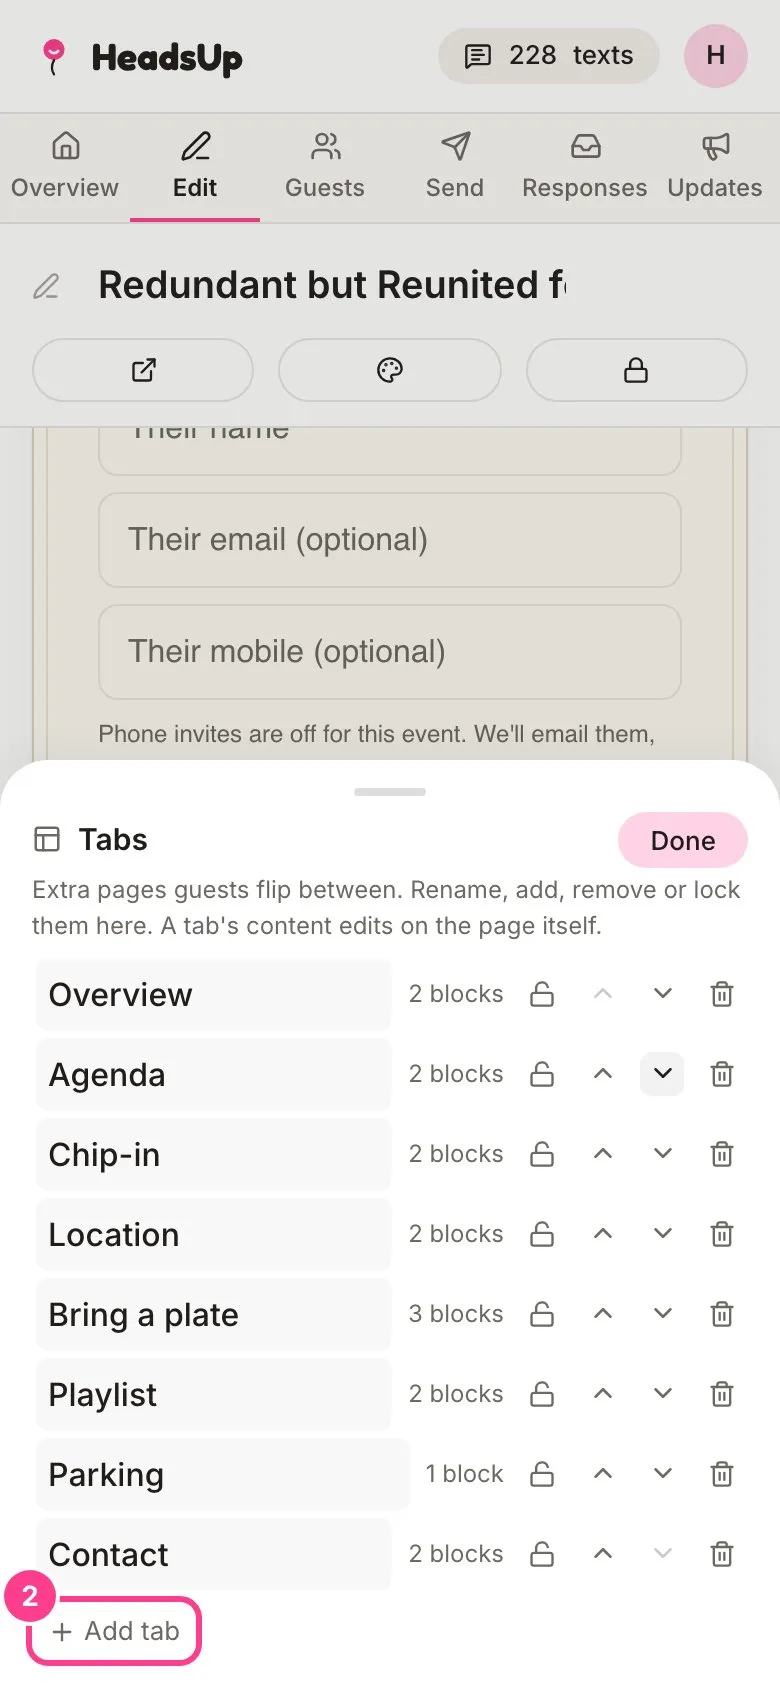
The Tabs panel lists your tabs. Tap Add tab.
-
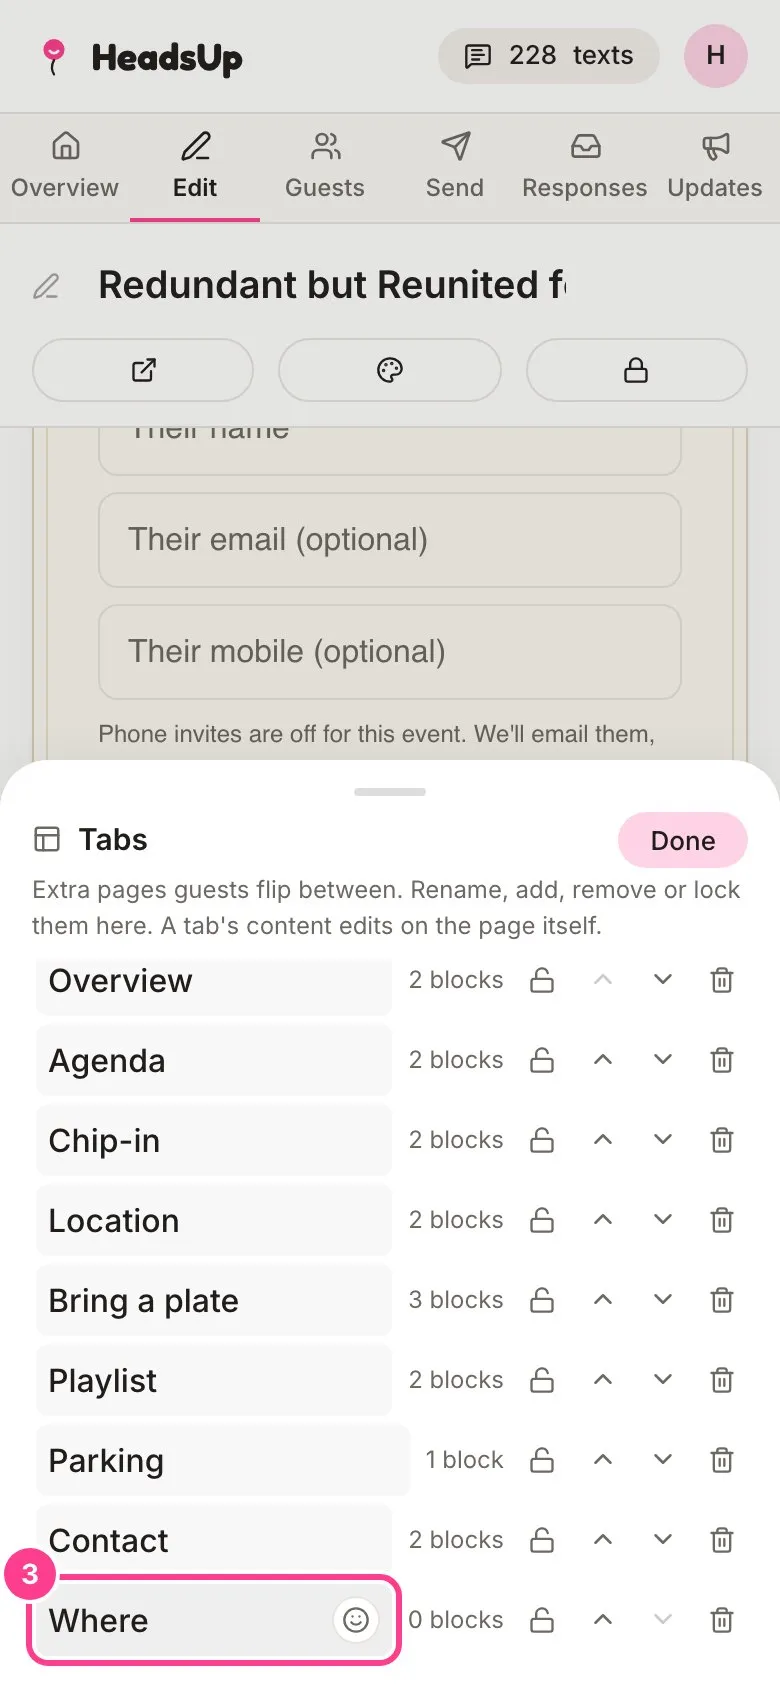
Type a name for the new tab over New tab. Use the arrows to change the order guests see them in. Tap Done.
-
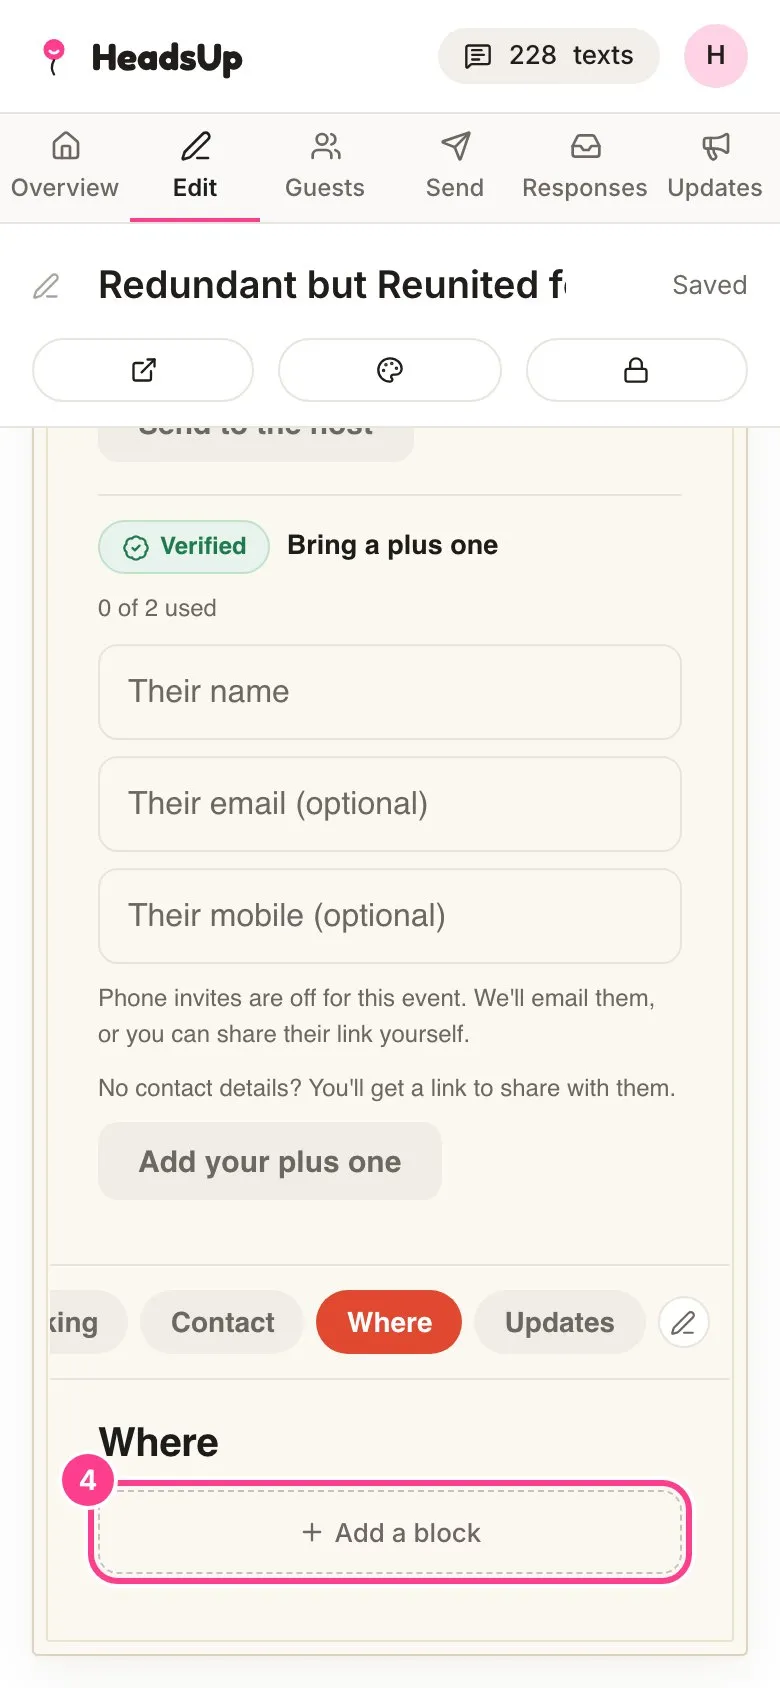
Tap your new tab on the invite and fill it with blocks, starting with Add a block.
Good to know
- Each row in the Tabs panel shows how many blocks are on that tab.
- Removing a tab removes everything on it. You’ll be asked to confirm first.
- The lock button on each row hides that whole tab until a guest verifies with a code. See locking a whole tab.
- You can move a block from one tab to another with the move button on its toolbar. See adding, moving and deleting blocks.
- Once you post an update, an Updates tab appears on its own. You don’t need to add it.
Didn't answer it?
Tell us what you were trying to do and we'll write back, or give our guide to your AI assistant and ask it.