How to create an event
Start a new event in HeadsUp in three quick steps, from a template, a blank page or an AI first draft.
Every invite in HeadsUp starts as an event. Creating one takes three short steps, and only the name is required. Everything you choose here can be changed later.
-
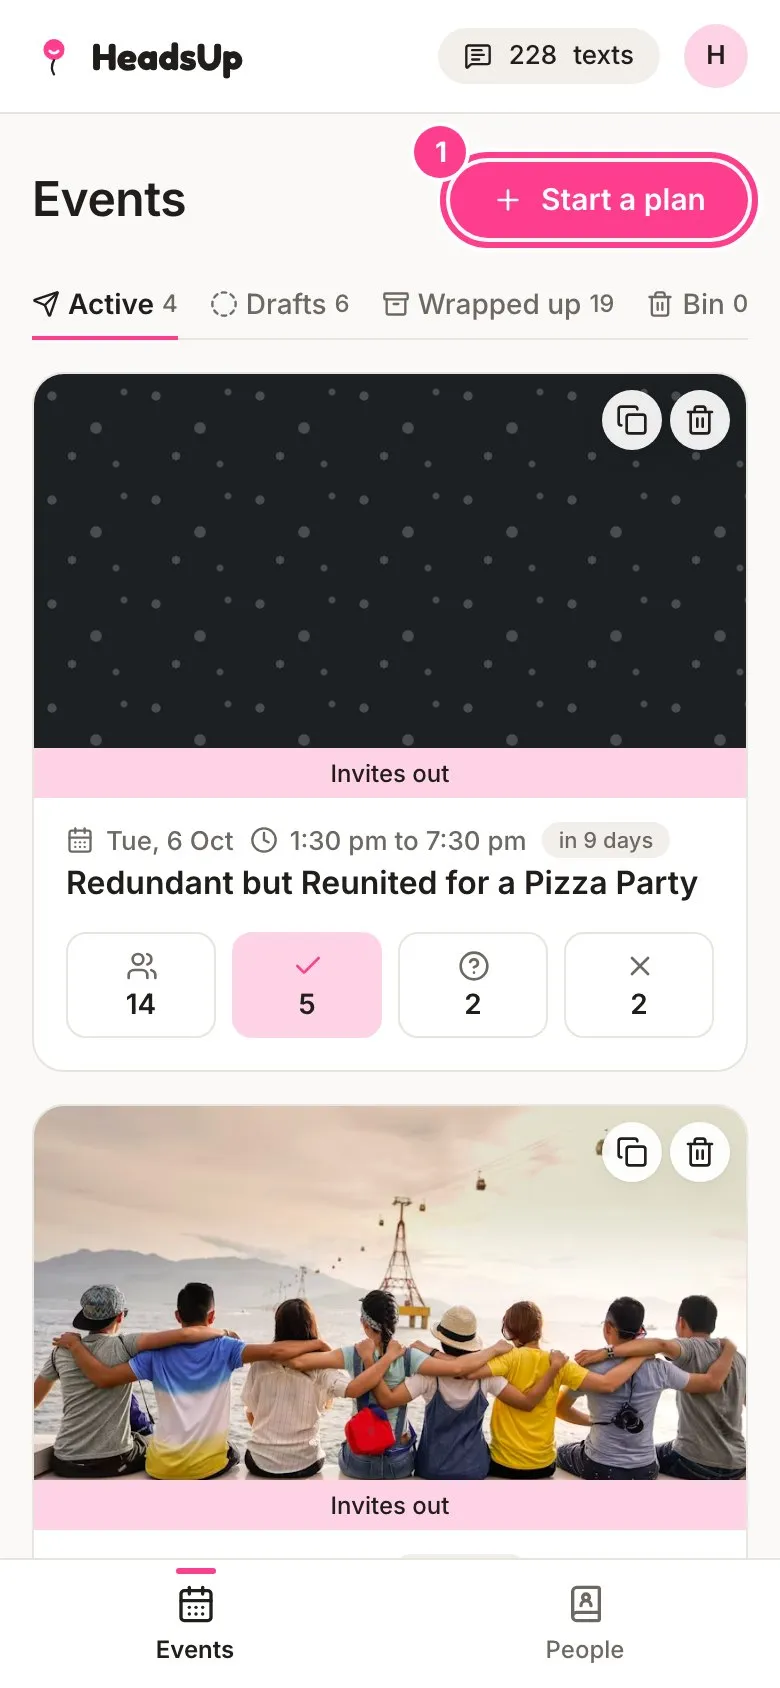
On your Events home, tap Start a plan.
-
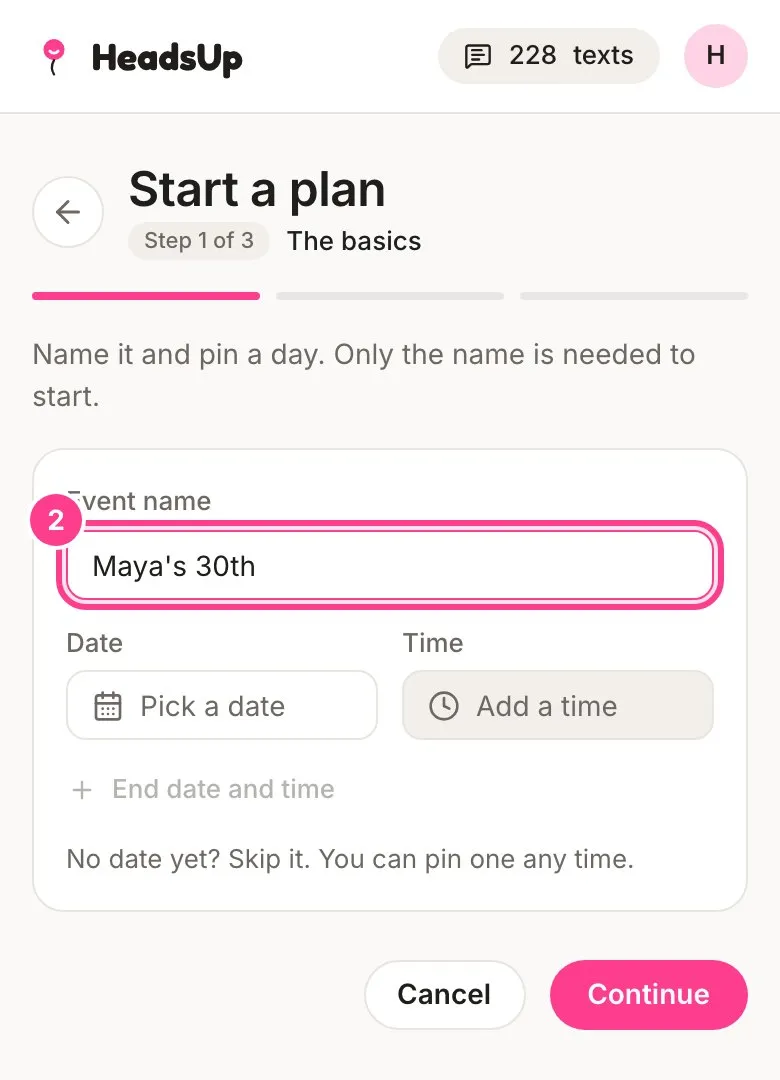
The basics. Type a name for your event. Add a date and a time if you know them, or tap End date and time to set when it finishes. No date yet? Leave it blank and add one any time. Tap Continue.
-
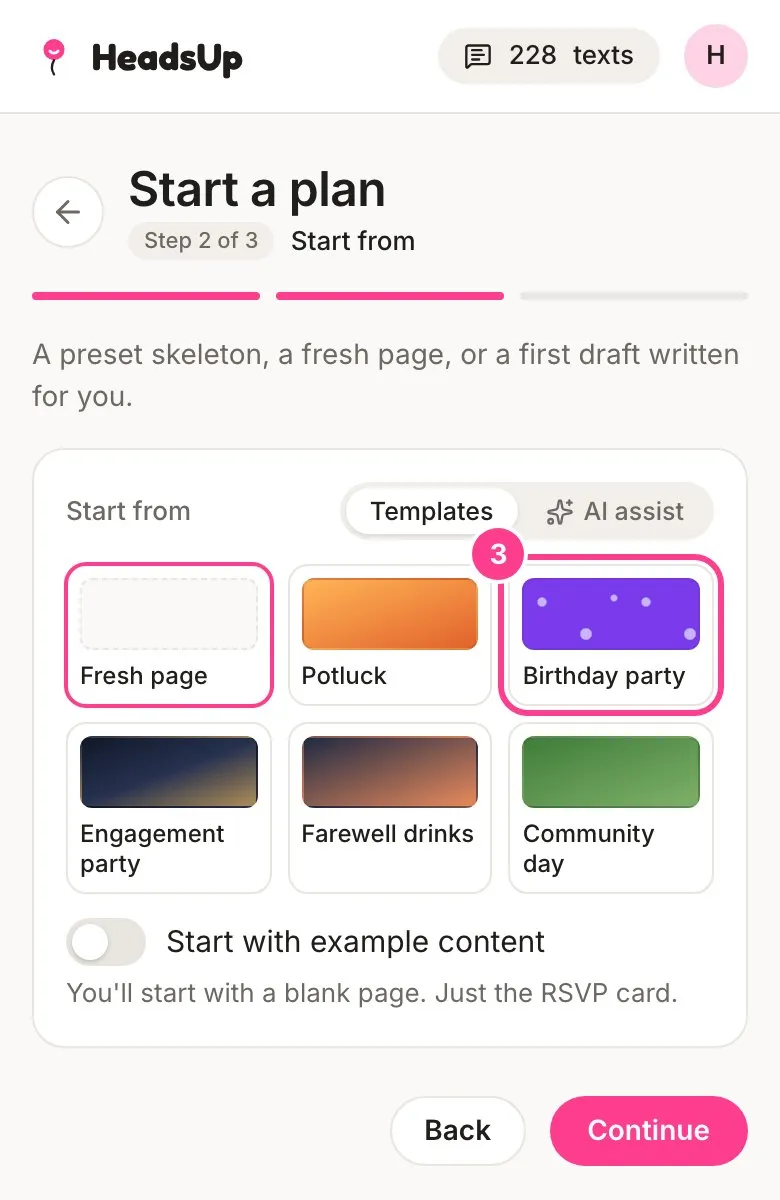
Start from. Pick a template, such as Birthday party or Potluck, or Fresh page to build your own. Until you’ve been through the editor’s quick tour, Fresh page comes with example blocks to write over. After that you get a Start with example content switch to choose between the examples and a blank page with just the RSVP card. Tap Continue.
-
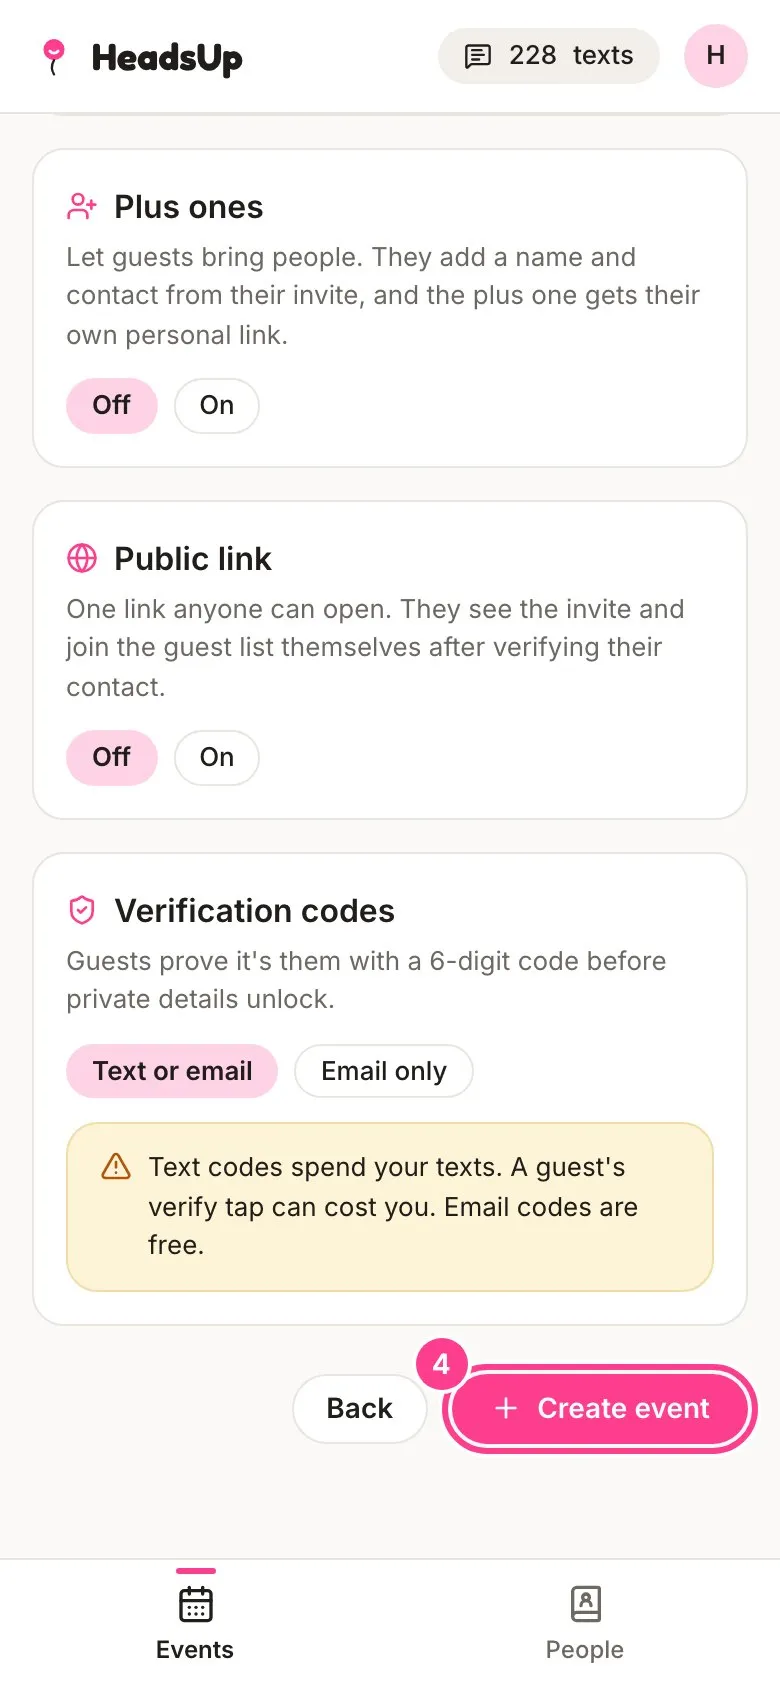
Guest features. Choose how guests can use your invite: whether they can send you Guest questions, bring Plus ones, or join from a Public link, and whether their Verification codes go by text or email only. Tap Create event.
Your new event opens straight in the editor, ready for you to design the invite.
Good to know
- On every paid plan, AI assist in step 2 writes a first draft of the invite, look included, from a short description of your event.
- Text verification codes use your texts. Email codes are free.
- Your event stays a draft until you send it. Drafts sit under the Drafts tab on your Events home.
- Drafts count towards the number of invites your plan lets you run at a time. On the Free plan that’s 3.
Didn't answer it?
Tell us what you were trying to do and we'll write back, or give our guide to your AI assistant and ask it.